Showing posts with label Kuman Robot SM5-1. Show all posts

Sunday, February 16, 2020

A Night With The Visuino Robots at CodeCraft

Last Wednesday I was presenting Visuino Robots Programming at CodeCraft, organized by Mircea Nedelcu, and hosted at the CJ Affiliate office in Westlake Village, CA

This is an amature video recorded at the event:

M5Stack BugC ESP32 Robot controlled by JuyC over WiFi:

And here are some short videos of some of the robots.
Elegoo Walking Arduino Penguin Bot:

RemoteXY WiFi controlled YahBoom Robot with ESP32 BPI:Bit controller:


Source code for the robots: http://www.mitov.com/CodeCraftRobotProjects.zip I used this latest development version of Visuino: https://www.visuino.com/installs/Visuino_7_8_3_26_Update5.zip Link to the CdeCraft Meetup event: https://www.meetup.com/codecraftgroup/events/chfblrybcdbqb/ Visuino Web Site - https://www.visuino.com RemoteXY Web Site - http://remotexy.com/ Robots by: ELEGOO - www.elegoo.com KUMAN - www.kumantech.com YAHBOOM - yahboom.net M5Stack - m5stack.com BPI:Bit controller by: Banana Pi - www.banana-pi.org

I am sorry for the bad quality, but we just used some phones to record as much as we could.
I hope you will enjoy it even in this sorry form. I will try to record and post more events in the future.

Cheers,
Boian


Tuesday, February 21, 2017

Connecting the USB cables of the Kuman Robot

Recently I received this cool robot from Kuman donated for the Visuino development :-).


The robot has 4 main parts that need to come together:

  1. The Chassis
  2. The Control and Wi-Fi boards
  3. The Camera with its Pan and Tilt mount
  4. The Manipulator

I already posted number of videos:
Here is the next Assembly video showing how to connect the USB cables between the camera and the boards :


I am processing the recorded videos of the rest of the assembly, and will post them soon :-).
I have also started working on programming the robot with Visuino, and Visuino already has support for the Motor Driver Shield used in the Robot;

Cheers,
  Boian

#Visuino #Arduino

Friday, February 17, 2017

Installing the Rechargeable Battery on the Kuman Robot

Recently I received this cool robot from Kuman donated for the Visuino development :-).


I am processing the recorded videos of the rest of the assembly, and will post them soon :-). After that, I will start working on programming the robot with Visuino.

Cheers,
  Boian

#Visuino #Arduino

Thursday, February 09, 2017

Installing the Manipulator on the Kuman Robot

Recently I received this cool robot from Kuman donated for the Visuino development :-).


I am processing the recorded videos of the rest of the assembly, and will post them soon :-). After that, I will start working on programming the robot with Visuino.

Cheers,
  Boian

#Visuino #Arduino

Wednesday, February 01, 2017

Installing the Wi-Fi Camera on the Kuman Robot

Recently I received this cool robot from Kuman donated for the Visuino development :-).

The robot has 4 main parts that need to come together:

1. The Chassis
2. The Control and Wi-Fi boards
3. The Camera with its Pan and Tilt mount
4. The Manipulator

I already posted Unboxing video - showing the robot coming out of the box, how to assemble the Pan and Tilt Camera Mount, how to install the Arduino, Motor Shield and the Servo Control Boards, and how to connect the Driving Motors to the Motor Shield.
Here is the next Assembly video, showing how to install the Camera on the Chassis:


I am processing the recorded videos of the rest of the assembly, and will post them soon :-). After that, I will start working on programming the robot with Visuino.

Cheers,
  Boian

#Visuino #Arduino

Sunday, January 29, 2017

Connecting the Driving Motors to the Motor Control Shield of the Kuman Robot

Recently I received this cool robot from Kuman donated for the Visuino development :-).
It has Remote WiFi control module, Camera, and 4 servos Manipulator.

The robot has 4 main parts that need to come together:

1. The Chassis
2. The Control and Wi-Fi boards
3. The Camera with its Pan and Tilt mount
4. The Manipulator

I already posted Unboxing video - showing the robot coming out of the box, how to assemble the Pan and Tilt Camera Mount, and how to install the Arduino, Motor Shield and the Servo Control Boards.
Here is the next Assembly video, showing how to connect the Driving Motors to the Motor Control Shield:


I am processing the recorded videos of the rest of the assembly, and will post them soon :-). After that, I will start working on programming the robot with Visuino.

Cheers,
  Boian

#Visuino #Arduino

Thursday, January 19, 2017

Installing the Arduino, Motor control, Servo control, and Wi-Fi Boards of the Kuman Robot


Recently I received this cool robot from Kuman donated for the Visuino development :-).
It has Remote WiFi control module, Camera, and 4 servos Manipulator.

The robot has 4 main parts that need to come together:

1. The Chassis
2. The Control and Wi-Fi boards
3. The Camera with its Pan and Tilt mount
4. The Manipulator

I already posted Unboxing video - showing the robot coming out of the box, and how to assemble the Pan and Tilt Camera Mount.


I am processing the recorded videos of the rest of the assembly, and will post them soon :-). Then will start working on programming the robot with Visuino.

Cheers,
  Boian

#Visuino #Arduino

Monday, January 16, 2017

Assembling the Tilt and Pan Camera mount of the Kuman robot


Last week I received this cool robot from Kuman donated for the Visuino development :-).
It has Remote WiFi control module, Camera, and 4 servos Manipulator.

I already posted my first ever Unboxing video - showing the robot coming out of the box :-)
The robot has 4 main parts that need to come together:

1. The Chassis
2. The control and Wi-Fi boards
3. The Camera with its Pan and Tilt mount
4. The Manipulator

The Manipulator and the Chassis are preassembled.
The Pan and Tilt mount however needs to be assembled. It is a popular type of mount, so I decided to make a video of assembling it first, and show how to mount it on the chassis in following videos.

And it became my first ever Assembly video:

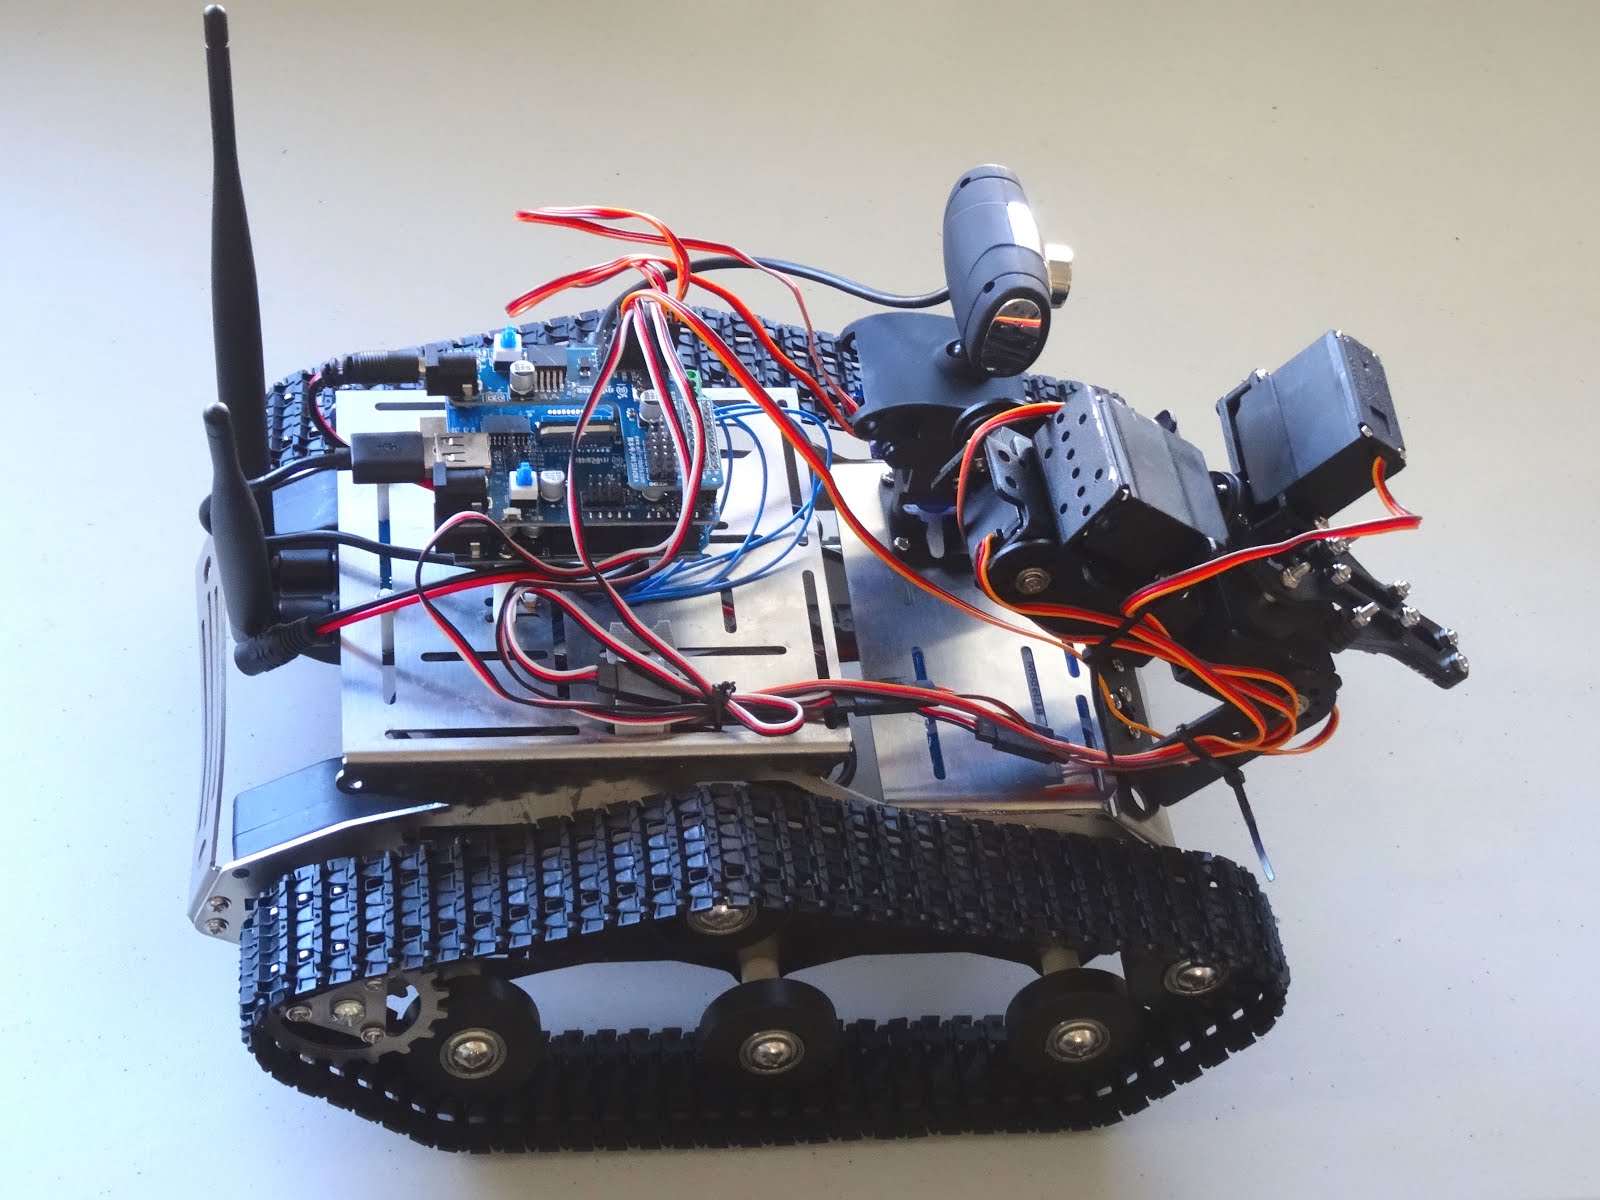
I completely assembled the robot already. Here are some pictures of it:


I am processing the recorded videos of the entire assembly, and will post them soon :-)
Then start working to program the robot with Visuino and control it with VideoLabVisionLab, IntelligenceLab, and CommunicationLab :-)

Cheers,
  Boian

#Visuino #Arduino

Saturday, January 14, 2017

Received a really cool Remote WiFi Robot with Camera and 4 servos Manipulator from Kuman for the Visuino development :-)

This week I received this cool robot from Kuman donated for the Visuino development :-).
It has Remote WiFi control module, Camera, and 4 servos Manipulator.
I will be posting assembly instructions soon, but here is a short unboxing video, and some pictures from the parts :-)


Looking forward to assemble it and start programming it with Visuino :-) . Since it has Wi-Fi camera, I also probably will be able to use it in combination with VideoLab, VisionLab, IntelligenceLab, and CommunicationLab so some fun time is ahead :-)

Cheers,
  Boian

#Visuino #Arduino